


Articles
What is the Best Bread Baking Method for Beginners?

22
Nov
Nov
Are you staring at complex recipes for homemade bread, feeling completely overwhelmed by advanced kneading techniques, mysterious sourdough starters, and precise temperature controls? For anyone starting their journey into the world of baking, the sheer volume of information can feel crippling. The goal of baking a beautiful, crusty loaf of artisan bread often seems beyond a beginner’s reach.
At MBICO, Mashhad Baking Industries, we specialize in the science and machinery behind professional baking. Through years of running educational workshops, we recognize a common hurdle we call “baker’s paralysis”—the fear of doing something wrong. As one aspiring baker once confided, “I’m afraid to even mix the flour and water.”
The Definitive Solution for Beginner Bread Baking
The single best method for a complete beginner is one that strips away technical complexity, guarantees a high rate of success, and builds the confidence needed to explore further. This foundational technique relies on time and fundamental chemistry rather than difficult manual labor: the revolutionary no-knead method.
The no-knead approach is your secret weapon. It empowers you to create a loaf with a deep, complex flavor profile, a crackling crust, and an airy, open crumb structure—all using just four simple ingredients and almost no active work. This is pure baking science applied expertly for the home kitchen.
Why is the no-knead method the ideal starting point?
- Focus on Flavor: Long, slow fermentation naturally develops the deepest flavor that kneading cannot achieve in a short time.
- Guaranteed Gluten Structure: Hydration and time handle the heavy lifting of gluten development, removing the need for manual skill.
- Confidence Builder: By minimizing active steps, this approach maximizes success, quickly transforming fear into enthusiasm for baking.
By the end of this guide, you will not only understand what is the best bread baking method for complete beginners, but also learn how to apply it effectively in your baking process to bake a stunning loaf this week.
Why a simple method is crucial for beginner success
The journey to becoming a competent baker is built on a series of small wins. When your first attempt produces a delicious, beautiful loaf, it provides the motivation to learn more. Conversely, early failures—a dough that doesn’t rise, a loaf as dense as a brick—can be so discouraging that the passion fizzles out before it truly ignites. This is why simplicity is the most important feature of a beginner’s baking method.
Traditional bread recipes often front-load the most technically demanding steps. They require you to learn how to knead properly—a physical skill that takes practice to master. You have to feel when the dough has developed enough gluten, a sensory judgment that is difficult for a novice to make. The no-knead method brilliantly sidesteps these challenges by replacing the physical work of kneading with the invisible work of time and fermentation.
In our years of experience setting up industrial baking lines, we’ve learned that the most reliable processes are often the simplest. Automation in our MBICO systems is designed to eliminate variables and guarantee consistency. The no-knead method does the same for the home baker; it removes the variable of inconsistent kneading technique.
For a beginner, the key is to focus on understanding the core relationship between flour, water, yeast, and time. By removing the physical barrier of kneading, you can observe the fermentation process directly, building an intuitive feel for how dough should look, smell, and feel as it develops. This foundational knowledge is far more valuable than memorizing a dozen complex shaping techniques on day one.
The no-knead method is the best starting point
First popularized by baker Jim Lahey in New York, the no-knead method is a high-hydration technique where a very wet, sticky dough is left to ferment for a long period—typically 12 to 18 hours. This extended time allows for full flavor development and, crucially, lets gluten form on its own without any kneading. The final step of baking in a preheated, covered pot like a Mini Deck Oven creates a steamy environment that mimics a professional deck oven, producing incredible oven spring and a bakery-quality crust.
This method is the perfect fit for a beginner for several key reasons:
- It is incredibly forgiving. Is your fermentation time 14 hours instead of 12? It will likely be fine. Is your shaping a little clumsy? The rustic, artisan look is part of its charm.
- It requires minimal hands-on time. The active work of mixing takes less than five minutes. The rest is simply waiting.
- The results are consistently spectacular. It’s one of the easiest ways to achieve the coveted crackly crust and open, airy crumb that defines artisan bread.

Discover how fermentation builds gluten without kneading
So, how can you develop a strong dough structure without the pushing, pulling, and folding of kneading? The answer lies in the science of flour and water. When flour is hydrated, two proteins within it—glutenin and gliadin—begin to link together to form the elastic network we know as gluten. Kneading is a mechanical process that speeds up this alignment, stretching and organizing the protein strands.
In the no-knead method, we use two natural processes to achieve the same result: autolysis and fermentation. Autolysis is the process that begins the moment you mix flour and water. Enzymes naturally present in the flour, primarily protease, start to break down the proteins, making them more pliable and ready to form gluten bonds. The high water content in a no-knead recipe (high hydration) creates a fluid environment where these proteins can move around and find each other more easily.
Next, the long, slow yeast fermentation process takes over. As the yeast consumes sugars and releases carbon dioxide gas, these gas bubbles move through the dough. This gentle, constant internal movement pushes and stretches the developing gluten strands over many hours, effectively organizing them into a strong and elastic web. It’s like a million tiny hands kneading the dough from the inside out. In our MBICO research and development labs, we use sophisticated rheometers to measure this dough development. But at home, you can see the proof in the pudding: a slack, sticky mixture transforms into a cohesive, web-like dough full of air bubbles, all while you were sleeping.
This method minimizes equipment and simplifies the process
Another significant barrier for many beginners is the perceived need for expensive and specialized baking equipment. You do not need a stand mixer, a banneton (proofing basket), or a baker’s lame (scoring blade) to get started with this method. The beauty of it lies in its simplicity.
Here is all the baking equipment for beginners that you truly need:
- A large bowl: For mixing and the long first fermentation.
- A spoon or spatula: To mix the ingredients.
- Plastic wrap or a tea towel: To cover the bowl.
- A mini oven or a heavy, oven-safe pot with a lid: This is the most crucial piece. It traps steam released from the dough, creating a humid environment essential for a crispy crust.
- Parchment paper: Makes it easy and safe to lower the wet dough into the hot pot.

This short list makes the process accessible to virtually anyone with a kitchen. The focus is on the technique and the ingredients, not on accumulating gear. This minimalist approach allows you to master the fundamentals of fermentation and baking before deciding to invest in more advanced tools.
Follow this step-by-step guide to your first artisan loaf
This is a foundational no-knead bread recipe for beginners. We’ll walk through each step, explaining the “why” behind the “how.” The goal is not just to follow instructions, but to understand the process. This four-ingredient bread is the cornerstone of your baking education.
Gather your four essential ingredients
Quality ingredients are the foundation of quality bread. For this simple bread baking recipe, you will need:
- Bread Flour (500g): Bread flour has a higher protein content (typically 12-14%) than all-purpose flour, which helps form a stronger gluten network. This is ideal for the chewy, open crumb of artisan bread.
- Water (375g – 400g): Use lukewarm water (around 32-35°C or 90-95°F). This temperature helps to wake up the yeast without being hot enough to harm it. This recipe has a hydration level of 75-80% (water weight divided by flour weight), which is key to the no-knead process.
- Salt (10g): Salt is crucial for flavor, but it also plays a technical role in strengthening the gluten structure and controlling the rate of fermentation. Use fine sea salt or kosher salt.
- Instant Dry Yeast (2g, or about 1/2 teaspoon): A tiny amount is needed because of the long fermentation time. Instant yeast can be mixed directly with the dry ingredients.
A note on measurements: Using a digital kitchen scale is highly recommended. Baking is a science, and volume measurements (cups) can be wildly inaccurate depending on how you scoop the flour. A scale ensures your dough hydration is precise every time, leading to consistent results.
Mix the dough in under five minutes
This is the only “active” work you will do for the next 12 hours. The process is incredibly simple.
- In your large bowl, whisk together the flour, salt, and instant yeast. This ensures the ingredients are evenly distributed.
- Pour in the lukewarm water.
- Using a spatula or wooden spoon, mix until just combined. The dough will look shaggy, sticky, and messy. Do not overmix. Your goal is simply to ensure there are no dry patches of flour left.
- Scrape down the sides of the bowl, cover it tightly with plastic wrap or a damp towel, and place it in a draft-free spot at room temperature (around 21-24°C or 70-75°F).
That’s it. You have now started the yeast fermentation process that will do all the hard work for you.
Let the long fermentation process work its magic
Now, you wait. For the next 12 to 18 hours, the dough will undergo its primary fermentation, also known as the bulk rise. During this time, you will see visible changes:
- The dough will at least double, and possibly triple, in size.
- The surface will be covered in bubbles of various sizes.
- When you look closely, you will see web-like strands of gluten have formed throughout the dough.
- It will smell slightly tangy and alcoholic, a pleasant byproduct of fermentation.
The exact time will depend on the temperature of your room. A warmer room will speed up fermentation, while a cooler room will slow it down. Don’t worry about hitting a precise time; look for the visual cues.
Shape the dough with gentle hands
After the long fermentation, the dough will be bubbly, sticky, and full of air. Our goal here is not to knead it, but to gently form it into a round shape (a boule) for its final proof.
- Generously flour a clean work surface. Also, flour your hands.
- Gently scrape the dough out of the bowl and onto the floured surface. It will be slack and want to spread out.
- Gently fold the dough over on itself a few times. Take one edge, stretch it slightly, and fold it toward the center. Rotate the dough and repeat this 3-4 times. This builds a little tension on the surface of the dough, which will help it hold its shape.
- Flip the dough over so the seams are on the bottom. Using your cupped hands, gently tuck the sides under to form a taught ball.
- Place the shaped dough on a piece of parchment paper. You can let it rest here for its final proof.
Prepare for the final proof and preheat your oven
The final proof is a shorter resting period (30-60 minutes) that allows the dough to relax and rise a little more before baking. Let the shaped dough rest on the parchment paper, covered lightly with plastic wrap or a tea towel.
About 30 minutes into this final proof, it’s time to preheat your baking oven. This is a critical step.
- Place your mini oven, with the lid on, into the cold oven.
- Set the oven temperature to 230°C (450°F).
- Let the oven and the pot preheat together for at least 30 minutes, and up to an hour. Getting the pot screaming hot is essential for the initial “oven spring” and a great crust.
Bake the bread to achieve a perfect crust and crumb
This is the final, exciting step. Be very careful, as the pot will be extremely hot.
- Once preheated, carefully remove the hot pot from the oven.
- Using the parchment paper as a sling, lift your proofed dough and carefully lower it into the hot pot.
- Place the lid back on the pot and return it to the oven.
- Bake for 30 minutes with the lid on. This traps the steam, keeping the crust soft and allowing the bread to expand to its maximum volume.
- After 30 minutes, remove the lid. The bread will be pale but fully risen.
- Continue to bake for another 15 to 25 minutes with the lid off. This allows the crust to dry out and develop a deep, golden-brown color.
- Carefully remove the bread from the pot and place it on a wire rack to cool completely. Do not cut into it while it’s hot! The bread is still cooking internally, and slicing it too early can result in a gummy texture.
The sound of the crackling crust as it cools is one of the most satisfying rewards in all of baking. You have just made a phenomenal crusty bread recipe with minimal effort.
Avoid these common mistakes beginners often make
While the no-knead method is forgiving, a few common issues can trip up new bakers. Understanding them will help you troubleshoot and perfect your technique.
Understand why your dough feels too sticky
A common concern is that the dough is “too wet” or “impossible to handle.” Remember, this is a high-hydration dough by design. That’s what creates the open, airy crumb. The key is not to add a lot more flour, which will make your bread dense. Instead, use flour strategically on your work surface and hands during the brief shaping stage. A bench scraper can also be a beginner’s best friend for handling and folding wet dough. The stickiness is a feature, not a bug!
Learn what to do if your dough does not rise
The most common cause for a dough that doesn’t rise is inactive yeast. Yeast is a living organism and can die if it’s old or stored improperly. Always check the expiration date. Another culprit is water temperature—water that is too hot (above 50°C or 120°F) can kill the yeast instantly. Finally, a very cold room can significantly slow down fermentation. If your house is chilly, find a warmer spot, like inside an oven with just the light on.
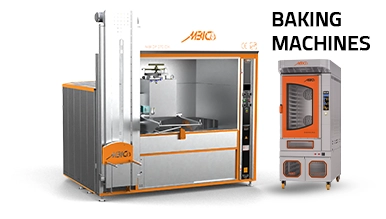
See why a mini oven is your secret weapon
One of the most frequent questions our customers ask is if they can bake this bread on a simple baking sheet. While you can, the results will not be the same. The magic of the mini oven is its ability to trap steam.
In our MBICO industrial tunnel and deck ovens, we have sophisticated steam injection systems. These systems release a precise amount of steam into the baking chamber during the first few minutes of baking. This moisture keeps the outer crust of the dough soft and pliable, allowing it to expand fully—a phenomenon called “oven spring.” The Convection Oven creates a personal steam chamber for your loaf, perfectly replicating this professional environment on a small scale. It is the single most important tool for achieving a bakery-quality crust at home.
Compare the no-knead method to other baking techniques
To fully appreciate why the no-knead method is the best starting point, it’s helpful to see how it stacks up against other common methods. This comparison highlights the trade-offs between time, skill, and results.
| Technique | Time Commitment | Skill Level | Equipment | Flavor Profile |
|---|---|---|---|---|
| No-Knead Method | Low Active Time (10 mins) High Passive Time (12-20 hours) |
Beginner | Minimal (Bowl, Convection Oven) | Complex, slightly tangy due to long fermentation |
| Traditional Kneading (Direct Method) | Medium Active Time (20-30 mins) Low Passive Time (2-3 hours) |
Intermediate | Standard (Bowl, Baking Sheet/Stone) | Simple, clean flavor of the grain |
| Sourdough Baking | High Active Time (multiple folds) Very High Passive Time (Days/Weeks for starter) |
Advanced | Specialized (Banneton, Lame, Scale) | Deeply complex, tangy, and sour |
The direct method requires active dough development
The traditional method, often called the “direct method,” uses more yeast and relies on 10-15 minutes of vigorous kneading to develop gluten. The fermentation time is much shorter, typically 1-2 hours. While it’s faster from start to finish, it requires the baker to learn the feel of a properly developed dough, which is a significant hurdle for beginners. The flavor is also simpler, as it lacks the complexity developed during a long, slow fermentation.
Sourdough baking introduces the challenge of starter management
Sourdough is the pinnacle for many bakers, but it is not a starting point. It uses a wild yeast culture (a “starter”) that you must feed and care for daily. This adds a significant layer of complexity and responsibility. The fermentation is less predictable, and the techniques for handling sourdough are more advanced. It’s a wonderful goal to aspire to, but we advise our clients to first master the fundamentals of fermentation with commercial yeast via the no-knead method.
Your baking journey has only just begun
Mastering the basic no-knead recipe is a monumental first step. It proves to you that you *can* bake incredible bread at home. From this solid foundation, a whole world of possibilities opens up. You can begin to experiment with small, simple changes that have a big impact.
Try swapping 25% of the bread flour for whole wheat or rye flour to add new flavors and textures. Fold in a handful of olives, herbs, or cheese during the shaping stage. Once you are comfortable with the feel of the dough, you can start exploring slightly lower hydration recipes and practice more advanced shaping techniques. Each loaf is a new experiment and a new lesson. The confidence you build with this simple, foolproof method is the most important ingredient you will carry forward in your baking journey.
Remember that every master baker, every artisan who shapes loaves with effortless grace, started with the same basic elements: flour, water, salt, and yeast. They started with a first loaf. This method ensures that your first loaf is a resounding success.

Frequently Asked Questions about What is the Best Bread Baking Method for Complete Beginners?
Can I use whole wheat flour for this no-knead recipe?
Yes, you can, but it’s best to start gradually. Whole wheat flour absorbs more water and has a different gluten structure. We recommend starting by replacing 25% of the bread flour with whole wheat flour (e.g., 375g bread flour and 125g whole wheat). You may need to add a little extra water (10-15g) to get the right consistency. A 100% whole wheat no-knead loaf is possible, but it will be denser and is a more advanced variation to try later.
What if I do not have a Mini Deck Oven?
A Mini Deck Oven is ideal, but you can simulate the effect. The goal is to trap steam. One alternative is to use a heavy pizza stone or a steel baking sheet on a lower rack and place a metal pan (like a broiler pan) on the rack below it. Preheat everything together. When you load the bread onto the hot stone/sheet, carefully pour a cup of hot water into the pan below and quickly close the oven door to trap the steam. Be very careful of the burst of steam. The crust may not be quite as robust, but it’s the next best thing.
How do I know when my dough has fermented long enough?
While the 12-18 hour window is a great guideline, the best way is to use visual cues. The dough should have more than doubled in volume, the surface should be covered in bubbles, and it should jiggle like gelatin when you gently shake the bowl. If you poke a floured finger into the dough, the indentation should spring back very slowly. If it springs back immediately, it needs more time. If it collapses, it may be slightly over-proofed, but it will still make a tasty (though perhaps flatter) loaf.
Can I let the dough ferment in the refrigerator?
Absolutely. This is called “cold fermentation” or “retarding” and it’s a great technique for developing even more complex flavor and managing your schedule. After the initial 12-hour rise at room temperature, you can place the covered bowl in the refrigerator for 1 to 3 days. The cold temperature slows the yeast activity way down, but flavor-producing bacteria continue to work. When you’re ready to bake, take the dough out, shape it, and let it have its final proof at room temperature for about 1-2 hours before baking as usual.
Explore MBICO's categories
Bakery equipment
13 Products
bulk and semi-bulk bread baking ovens
3 Products
Bulk Breads Baking equipment
14 Products
Confectionery equipment
7 Products
Mini ovens
3 Products
Pizza and food ovens
4 Products
Baking equipment
25 Products
Bakery oven
5 Products
Tafton baking ovens
3 Products
Barbari baking ovens
4 Products
Sangak bakery ovens
3 Products
Lavash baking ovens
3 Products
Pastry and confectionery ovens
3 Products
Baking ovens
10 Products
Mobile baking machines
4 Products
Explore MBICO's products
Flour Sifting Machine
Conveyor Pizza Oven
Automatic Production Line for Baking Sangak Bread
Mobile Bakery Container
Dough Divider Machine
Fixed Rotary Semi-Automatic Oven for Baking Traditional Breads
Deck Oven
Rimok Bakery