


Recipe
Mastering Pita (Khubz) Bread from Dough to Oven
 Bread from Dough to Oven 1")
06
Sep
Sep
Mastering the Perfect Pita Pocket: A Professional Guide to Khubz Baking Science and Technique
Every baker, amateur or professional, has experienced the frustration of a failed bake. I remember my early days in a bustling Middle Eastern bakery; the air was thick with the aroma of yeast, but my beautifully crafted dough rounds would emerge from the oven flat, dense, and utterly pocket-less. This humbling experience taught me that beneath the apparent simplicity of this ancient flatbread lies a profound interplay of science and meticulous technique.
The Culinary Marvel: Defining the Perfect Pita (Khubz)
The perfect pita, or Khubz as it is known across the Levant, is a testament to precision. It’s an unassuming round disk that magically inflates under intense heat to form a spacious, internal pocket, making it ideal for filling with falafel, creamy hummus, or savory grilled meats.
Achieving this elusive internal structure requires harnessing three critical elements:
- Gluten Development: Ensuring the dough has the necessary strength and elasticity to trap gases.
- Fermentation Control: Managing yeast activity precisely for optimal gas production.
- Thermal Dynamics: Applying rapid, high heat to flash-steam the interior before the crust fully sets.
Elevating Your Craft with Professional Equipment
For aspiring professionals and passionate home bakers seeking to master this intricate dance of fermentation and heat, understanding the science is only half the battle. Consistency demands the right tools. This journey is not just about mixing flour and water; it’s about utilizing robust equipment that guarantees thermal efficiency and repeatable results.
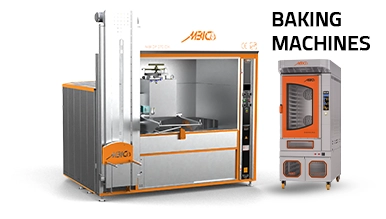
That is precisely why institutions and artisan bakers around the globe turn to MBICO (Mashhad Baking Industries), a leading manufacturer of high-quality, professional bakery equipment. By partnering expertise with reliable machinery, we empower bakers to achieve professional-grade results every single time.
By the end of this comprehensive article, you will not only have a deep understanding of the scientific principles behind the perfect pita pocket but also learn the exact techniques to apply them in your own kitchen, turning every bake into a triumphant success.
The Foundation: Ingredients and Their Role
To truly master pita, we must first understand its foundational components. While seemingly basic, each ingredient plays a critical role in developing that elusive internal pocket.
The Power of Wheat Flour: Gluten’s Embrace
Pita’s characteristic pocket is almost entirely dependent on a strong, extensible gluten network. Unlike a rustic sourdough where an open, irregular crumb is desired, pita requires a tight, elastic matrix capable of trapping gases. This is why a strong bread flour, typically with 12-14% protein, is ideal. In my years of running a professional bakery, I’ve found that the right flour can make or break your pita. The proteins gliadin and glutenin, upon hydration, form gluten. As you knead, these proteins align and cross-link, forming a mesh that can stretch without tearing.
Yeast: The Breath of Life
Yeast, our microscopic friend, is responsible for fermentation – converting sugars into carbon dioxide and ethanol. This gas is what inflates our dough, creating the initial bubbles that will eventually form the pocket. Active dry or instant yeast both work beautifully, but understanding their optimal temperature range (typically 75-95°F or 24-35°C) is key to consistent results. Too cold, and your dough will be sluggish; too hot, and you risk off-flavors and a weakened gluten structure.
Water and Salt: The Unsung Heroes
Hydration levels are critical. Pita dough typically has a hydration around 60-65%, making it pliable but not excessively sticky. Water isn’t just for hydration; it activates the yeast and facilitates gluten development. Salt, often overlooked, is crucial for flavor, controlling yeast activity, and strengthening the gluten network. Without salt, your dough would be slack and flavorless.
Crafting the Dough: Mixing, Kneading, and Fermentation
The journey from raw ingredients to a pocket-ready dough is where true craftsmanship shines. This stage is all about developing strength and flavor.
Mixing and Kneading: The Art of Gluten Development
Proper mixing ensures all ingredients are uniformly distributed, but kneading is where the magic happens. Whether by hand or with a stand mixer, the goal is to develop a smooth, elastic dough that passes the ‘windowpane test’ – a small piece of dough can be stretched thin enough to see light through without tearing. This indicates a well-developed gluten network, robust enough to trap gases. Over-kneading, however, can lead to a tough product, so watch for that perfect balance.
First Fermentation (Bulk Proof): Building Flavor and Strength
After kneading, the dough needs time to ferment. This bulk proof, typically 1-2 hours at room temperature (70-75°F or 21-24°C), allows yeast to produce gases and enzymes to break down complex starches, contributing to flavor and extensibility. This is a crucial window for flavor development. While some bakers swear by a long cold ferment for other breads, for pita, a shorter, warmer proof is often preferred to encourage rapid gas production and a tender crumb. Here’s the science behind both: colder temperatures slow yeast activity, allowing more complex flavors to develop, while warmer temperatures accelerate it, leading to a quicker rise and milder flavor.
Shaping and Second Proof: Precision for the Pocket
This stage is where we prepare the dough for its spectacular transformation in the heat.
Dividing and Rounding: Uniformity is Key
Once bulk-proofed, gently divide the dough into uniform pieces (around 80-100 grams each for standard pita). Lightly round each piece into a ball. This creates surface tension, which will aid in shaping and puffing. Resist the urge to add too much flour during this process; excessive flour can prevent the dough from sealing properly later.
Resting and Rolling: The Delicate Balance
After rounding, let the dough balls rest for 10-15 minutes. This allows the gluten to relax, making them easier to roll. Then, gently roll each ball into a uniform 6-8 inch (15-20 cm) disk, about 1/8 inch (3mm) thick. The key here is even thickness. Any thin spots will tear, releasing steam and preventing a full pocket. Too thick, and the pocket will be small or non-existent. Think of it as creating a perfectly sealed balloon ready for inflation.
Second Proof (Final Proof): The Last Ascent
Arrange the rolled disks on a lightly floured surface, cover them, and let them proof for another 20-30 minutes. You’re looking for a slight puffiness, not a dramatic rise. Over-proofing can lead to a weak gluten structure that collapses in the oven, while under-proofing won’t have enough gas to create the pocket. It’s a delicate balance.
The Heat Factor: Baking the Perfect Pita
This is the moment of truth. The rapid, high heat of the oven is what performs the magic.
The Science of the Pocket: Steam and Rapid Expansion
When the pita hits a scorching hot surface, the trapped moisture within the dough rapidly turns into steam. This steam, along with the gases produced by yeast, expands furiously. Because the outer crust sets almost instantly due to the high heat, the steam is trapped inside, forcing the top and bottom layers of the dough to separate, forming that iconic pocket. This phenomenon, often called ‘oven spring,’ is amplified in pita due to the specific dough structure and high baking temperatures.
The Ideal Oven: Blazing Hot and Consistent
For a perfect pita, you need intense, direct heat. A conventional home oven often struggles to reach the ideal temperatures (500-550°F or 260-290°C) and maintain them consistently. This is where specialized equipment makes a world of difference. A professional bakery oven, designed for high-temperature baking, provides the sustained heat necessary for the rapid steam conversion that creates the pocket. In my experience, the difference between a home oven and a professional one is night and day when it comes to pita. Whether you’re a small startup or a large industrial producer, investing in quality bakery equipment is paramount for consistent, authentic results. While many envision these ovens solely for traditional breads, the technology is often versatile, allowing them to also function as pizza and food ovens, making them a valuable asset for any kitchen aiming for high-quality, high-volume production.
Baking Technique: Quick and Hot
Bake pita one or two at a time on a preheated baking steel or pizza stone. Slide them in quickly. They should puff up dramatically within 30-60 seconds. Bake for a total of 2-3 minutes, flipping once if desired, until lightly browned and fully puffed. Remove immediately and stack them, covered with a clean towel, to keep them soft and pliable.
Conclusion: Your Journey to Pita Perfection
Mastering pita is a rewarding endeavor that beautifully marries culinary art with food science. From understanding the pivotal role of gluten in wheat flour to orchestrating the rapid expansion of steam in a scorching hot oven, every step is critical to achieving that perfect, ethereal pocket. Remember, consistency in your ingredients, precision in your kneading, and a judicious hand in shaping are all prerequisites for success. But the true game-changer often lies in the heat – the ability to deliver a burst of intense, even warmth that transforms simple dough into a culinary staple. This weekend, try adjusting your dough’s hydration by 2% and observe the difference in the crumb, or experiment with preheating your baking stone for an extra 30 minutes. Embrace the process, learn from each bake, and soon, you’ll be pulling perfectly puffed pita from your oven, ready to be filled and enjoyed.
Explore MBICO's categories
Bakery equipment
13 Products
bulk and semi-bulk bread baking ovens
3 Products
Bulk Breads Baking equipment
14 Products
Confectionery equipment
7 Products
Mini ovens
3 Products
Pizza and food ovens
4 Products
Baking equipment
25 Products
Bakery oven
5 Products
Tafton baking ovens
3 Products
Barbari baking ovens
4 Products
Sangak bakery ovens
3 Products
Lavash baking ovens
3 Products
Pastry and confectionery ovens
3 Products
Baking ovens
10 Products
Mobile baking machines
4 Products
Explore MBICO's products
Bakery & Pastry Trolley
Steam Generator
Portable Rotary Semi-Automatic Oven for Baking Sangak Bread
Mini Deck Oven
Toast Mould (Loaf Pans)
Dough Moulder Machine
Flour Sifting Machine
Tunnel Baking Oven