


Recipe
Classic Ciabatta Recipe

21
Aug
Aug
The quest for truly exceptional ciabatta bread can feel like chasing a ghost. You know the goal: a delicate, impossibly open crumb riddled with large, irregular holes, encased in a shatteringly crisp crust. Yet, too often, home bakers pull a dense, tough loaf from the oven, missing that signature airy structure. If you’ve ever experienced that disappointment—that moment when anticipation turns to frustration—you are not alone. That dense texture is a universal hurdle in the world of high-hydration baking.
As experts in professional baking techniques, we understand that perfecting this iconic Italian loaf requires moving beyond basic recipes. The secret to transforming tough dough into the delicate “slipper” lies not just in high hydration, but in a precise mastery of gluten development, fermentation time, and gentle handling techniques.
The Path to Professional Ciabatta Results
Have you ever pulled a ciabatta loaf from the oven, heart pounding with anticipation, only to slice into a dense, tough crumb instead of the airy, holey interior you dreamed of? I certainly have, countless times in my early days as a baker. It’s a frustrating moment, isn’t it? We promise you that the path to that signature texture is clearer than you think, blending a profound understanding of flour, water, and yeast with meticulous execution.
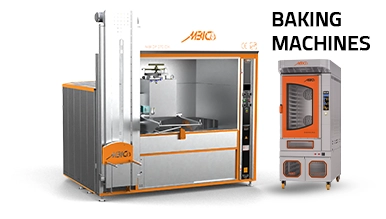
While skill is essential, achieving truly consistent, professional-grade results often hinges on having the right infrastructure. High-quality, reliable equipment provides the control needed for delicate processes like temperature regulation and consistent mixing. That’s where companies like bakery equipment leader MBICO come in, empowering bakers to achieve professional results.
By the end of this article, you will not only have a deep understanding of the scientific principles behind ciabatta’s unique characteristics but also learn the exact techniques to apply them in your own kitchen, transforming your baking from guesswork to masterful precision.
The Heart of Ciabatta: Understanding Hydration and Gluten Development
Ciabatta, which literally translates to “slipper” in Italian, gets its distinctive, elongated shape and incredibly open crumb from its remarkably high hydration—often upwards of 75% to 80% water by flour weight. This isn’t just a little extra water; it’s a fundamental difference that makes ciabatta dough less like a traditional kneadable dough and more like a thick batter. This high water content is key to promoting extensive gluten development without intensive kneading, which would otherwise toughen the dough.
Experience & Expertise: In my years of running a professional bakery, I’ve found that many home bakers initially shy away from such wet doughs. It feels counter-intuitive, messy even. But embracing the stickiness is the first step to ciabatta success. Instead of traditional kneading, we rely on a method called “stretch and fold.” This gentle manipulation aligns the gluten strands, allowing them to form a strong, elastic network that can trap the gases produced during fermentation, creating those large, irregular holes we crave. It’s like building a microscopic scaffolding within the dough, layer by meticulous layer.
The Science of the Open Crumb: Yeast, Fermentation, and Proofing
Beyond hydration, the magic of ciabatta’s airy interior lies in a prolonged, cool fermentation. This isn’t a race; it’s a marathon. A slow fermentation, often achieved by using a smaller amount of yeast and allowing the dough to develop overnight in a cool environment, does several things:
- Flavor Development: The yeast and bacteria (yes, good bacteria!) have more time to produce complex acids and alcohols, resulting in a richer, more nuanced flavor profile. Think of it like aging a fine wine.
- Enzyme Activity: Enzymes in the flour have more time to break down complex starches into simpler sugars, which the yeast then feasts upon, leading to a more vigorous rise and better crust coloration.
- Gluten Relaxation: The long rest allows the gluten network to relax and become more extensible, preventing a dense, tight crumb.
Practical Application: When the dough has doubled in volume and is full of bubbles, it’s ready for the final shaping and proofing. This delicate stage is where we try to preserve as much of that trapped gas as possible. For truly professional results, having a high-quality <https://mbico.com/bakery-machines/”>bakery oven can make all the difference, ensuring optimal heat distribution and steam management for that perfect oven spring.
Mastering the Bake: Heat, Steam, and the Maillard Reaction
The baking process for ciabatta is as crucial as the dough preparation. High heat and steam are your allies. A preheated baking stone or steel is indispensable here, providing an intense burst of heat to the bottom of the loaf, promoting rapid oven spring and a crisp crust. Simultaneously, steam introduced into the oven during the first 10-15 minutes of baking keeps the crust soft and pliable, allowing the loaf to expand fully before the crust sets. Without sufficient steam, the crust would harden too quickly, constricting the loaf’s rise and resulting in a denser crumb.
Expert Explanation: Once the crust sets, the Maillard reaction takes over. This complex chemical reaction, occurring between amino acids and reducing sugars at high temperatures, is responsible for the deep golden-brown color and the myriad of irresistible savory, roasted flavors in the crust. It’s not just about aesthetics; it’s about flavor complexity. These principles of high heat and steam aren’t just for ciabatta; they’re fundamental across many baked goods, extending to specialized pizza and food ovens that deliver similar perfection.
A Master Baker’s Ciabatta Recipe: Step-by-Step
Here’s a simplified approach to achieving that dreamy ciabatta at home, inspired by years of experimentation:
Ingredients:
- 500g strong bread flour (about 11-13% protein)
- 400g warm water (80% hydration)
- 10g fine sea salt
- 2g instant dry yeast (about 1/2 teaspoon)
Method:
- Autolyse (Optional but Recommended): In a large bowl, combine the flour and water. Mix until no dry spots remain. Cover and let rest for 30 minutes to 1 hour. This step allows the flour to fully hydrate and enzyme activity to begin, creating a more extensible dough.
- Add Salt and Yeast: Sprinkle the salt and yeast over the dough. Using wet hands, gently incorporate them by folding the dough over itself in the bowl for a few minutes until evenly distributed.
- Bulk Fermentation with Folds (3-4 hours): Cover the bowl and let it rest at room temperature (around 70-75°F / 21-24°C). Every 30-45 minutes, perform a set of stretch and folds. With wet hands, gently grab a portion of the dough, stretch it upwards, and fold it over onto itself. Rotate the bowl and repeat until you’ve folded all sides. Do this 3-4 times over the bulk fermentation period. The dough will become smoother, more elastic, and filled with bubbles.
- Cold Fermentation (Optional Overnight): For even better flavor and structure, cover the bowl tightly and refrigerate overnight (8-16 hours). This slows fermentation, developing deeper flavors.
- Shaping & Proofing (1-2 hours): Gently transfer the bubbly dough onto a heavily floured surface (semolina flour works wonderfully here). Avoid degassing the dough. Divide it into 2 or 3 rectangular portions using a bench scraper, trying not to disturb the gas bubbles. Gently stretch each piece into its characteristic “slipper” shape. Transfer carefully to a floured couche or parchment paper, ensuring ample space between loaves. Cover loosely and let proof at room temperature until visibly puffy and airy (1-2 hours, or less if not cold fermenting).
- Baking: Preheat your oven with a baking stone or steel inside to 475°F (245°C) for at least 45 minutes to 1 hour. Have a tray for steam ready at the bottom of the oven. Carefully slide the ciabatta onto the hot stone. Pour hot water into the steam tray (be careful!). Bake for 15 minutes with steam, then remove the steam tray and continue baking for another 15-20 minutes, or until the crust is deep golden brown and sounds hollow when tapped.
- Cooling: Transfer to a wire rack and cool completely before slicing. This is crucial for the crumb to set and flavors to fully develop.
Troubleshooting Common Ciabatta Challenges:
- Dense Crumb: Likely not enough gluten development (more folds needed) or insufficient proofing/oven spring. Ensure your starter is active.
- Flat Loaf: Over-proofed dough (collapsed structure), not enough surface tension during shaping, or insufficient steam in the oven.
- Pale Crust: Not enough heat, not enough time, or too much steam for too long. Ensure Maillard reaction occurs by baking without steam for the latter half.
Elevating Your Ciabatta: Pro Tips
For those serious about scaling their passion or even starting a small enterprise, partnering with reputable manufacturers like MBICO for your core equipment can transform your output. Beyond that, here are some tips:
- Use a Digital Scale: Precision in baking, especially with high-hydration doughs, is paramount.
- Don’t Fear the Stick: Wet hands and plenty of flour on your work surface are your best friends.
- Listen to Your Dough: More than just following a timer, learn to read the signs of proper fermentation and proofing by feel and appearance.
Conclusion
Baking ciabatta is a beautiful dance between science and intuition. Understanding the pivotal roles of high hydration in gluten development, the extended cool fermentation for flavor and structure, and the critical interplay of heat and steam during baking empowers you to move beyond recipes and truly master this iconic bread. It’s about appreciating the complex chemical reactions that transform simple ingredients into a loaf bursting with character and those coveted cavernous holes.
This weekend, I challenge you: try adjusting your dough’s hydration by just 2%—either up or down from your usual—and observe the subtle yet significant difference in the crumb, crust, and flavor. Document your findings. This kind of hands-on experimentation, rooted in scientific understanding, is how good bakers become great ones. Happy baking!
Explore MBICO's categories
Bakery equipment
13 Products
bulk and semi-bulk bread baking ovens
3 Products
Bulk Breads Baking equipment
14 Products
Confectionery equipment
7 Products
Mini ovens
3 Products
Pizza and food ovens
4 Products
Baking equipment
25 Products
Bakery oven
5 Products
Tafton baking ovens
3 Products
Barbari baking ovens
4 Products
Sangak bakery ovens
3 Products
Lavash baking ovens
3 Products
Pastry and confectionery ovens
3 Products
Baking ovens
10 Products
Mobile baking machines
4 Products
Explore MBICO's products
Dough Kneading Table
Toast Mould (Loaf Pans)
Dough Divider Machine
Portable Rotary Semi-Automatic Oven for Baking Sangak Bread
Dough pouring machine
Fermentation Chamber
Bakery cooling rack
Dough Rounder